Page 1 of 2 12 LastLast
Results 1 to 10 of 12
  1. #1
    Join Date
    Mar 2013
    Location
    Lake Murray, SC
    Posts
    65

    Default Looking for 1992 (or nearly afterward) Supra Comp Wiring Diagram

    Hello all

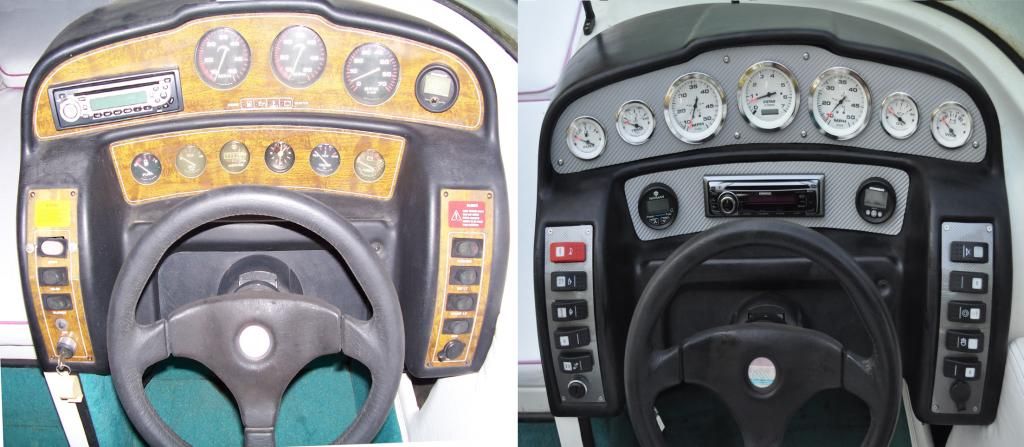
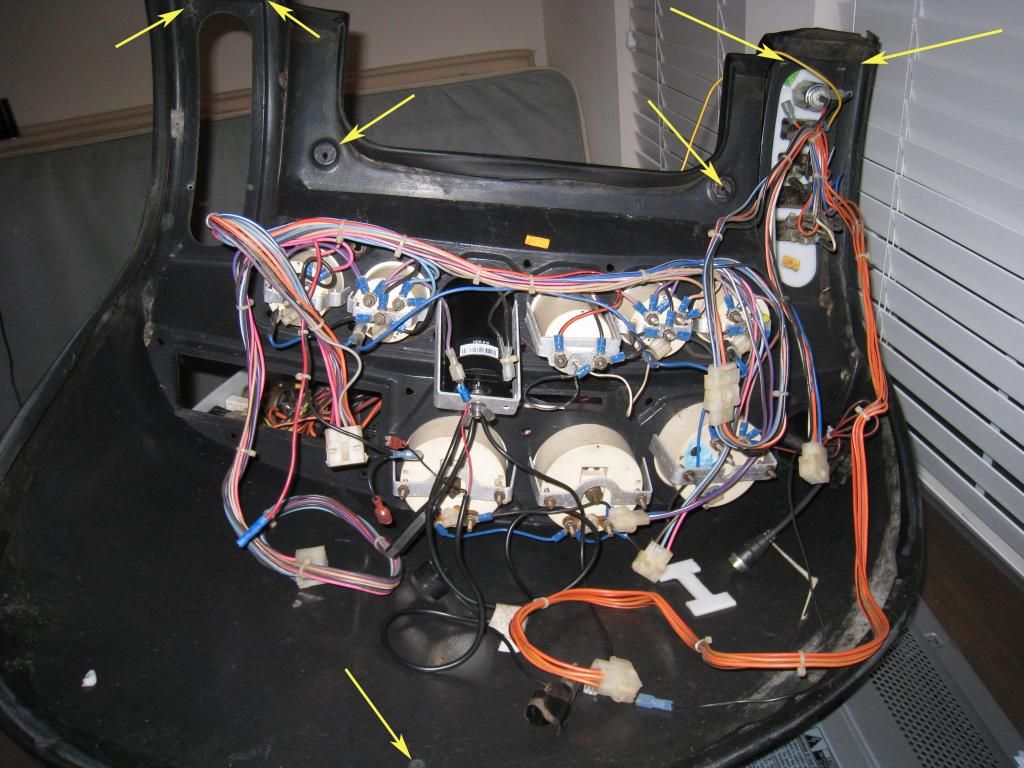
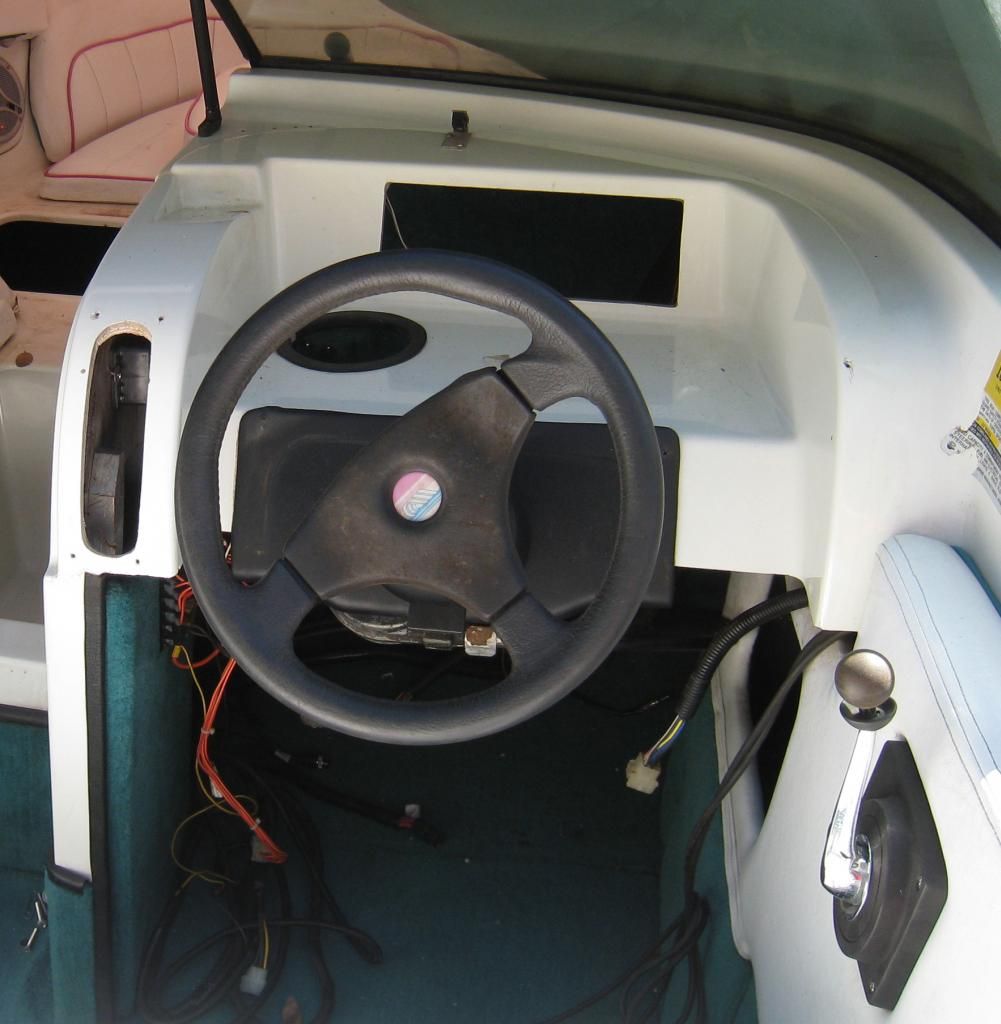
    I'm trying to hunt down a 1992 supra comp wiring diagram. The closest owner's manuals SC has for download is the 1990 20'&23' and then the 1999' comp and legacy. It is the rounded windshield, newer dash, all composite model. The dash is different from both the 1990 and 1999 manuals. I'm sure the directly following years would be the same until Supra changed the design (I do not know what year it was that they changed again). Any help would be much appreciated.

    dash.jpg

  2. #2
    Join Date
    Mar 2013
    Location
    Lake Murray, SC
    Posts
    65

    Default

    Mine is identical to this one for sale in Michigan.

    http://www.boattrader.com/listing/19...S-6M-101803896

  3. #3
    Join Date
    Jun 2010
    Location
    Ontario, Canada
    Posts
    1,087

    Default

    IIRC the wiring is virtually the same as the manual you pointed out...pretty sure when i check my 92 Saltare the wiring colours matched up to the manual.

  4. #4
    Join Date
    Mar 2010
    Location
    Windsor, Ontario
    Posts
    1,129

    Default

    Whats the issue?? Not many things never expored here on this boat....

    2003 Supra Launch " Gravity Games Edition"
    Dodge ram CTD tow vehicles....

  5. #5
    Join Date
    Mar 2013
    Location
    Lake Murray, SC
    Posts
    65

    Default

    First and foremost, my Tachometer has gotten stuck at 1000 rpms. Regardless of if the engine status is on or off. I wanted to check all of the connections before I resort to simply replacing the gauge.

    Second, I believe my temperature gauge is not working properly. I've understand that it will not cut on until the engine reaches running temp of 160 degrees, however I have ran the boat long enough to at least get it to running temp and the gauge is still sitting at 0 (120 I believe is the bottom end of my gauge).

    Third, whenever I turn my ignition switch to on without starting the engine, I get the low oil pressure alarm and the oil pressure gauge sits at 0. This alarm goes away the second the engine is started and my oil pressure gauge works properly. I'd like to just disable the alarm as it is very annoying.

    I don't have alot of play in my current wires around the dash, which makes it difficult to access the back of the gauges. Removing the windshield would fix this problem, but i'd like to avoid that if possible. So I was looking for a wiring diagram before I start digging into it.

  6. #6
    Join Date
    Jun 2010
    Location
    Round Rock, TX
    Posts
    12

    Default

    I recently reconfigured the dash on my '92 Saltare and also had trouble locating a diagram. I've attached a pic of the back of the factory tach from my '92 that might help in identifying your wiring.


  7. #7
    Join Date
    Feb 2013
    Posts
    2

    Default

    Hi
    i am from austria and i also have a 92 Supra comp ts6m.
    i rebuild the complete electric new in this winter. I have an little electric-box in the dashboard. From this box all alarms are comming. (the alarmhorn and 4 lamps)
    The fuelsensor the temp-sensor the oilsensor goes to the gauges. And all this signals are also connected to this electricbox.
    A horn and lamp alarm appears when: Voltage too low, or Oilpress too low, or Temp. too high or fuel too low (fuel is only lamp-no horn)!
    This box is only measuring the electric-resistor of your sensors. If a resistor is out of limit-then the alarms appears. For example: Low Fuel=under 240Ohm=Lamp is switched on in the board!
    The same for Temp. and Pressure. (But with other Ohm-values)
    You can adjust the Alarm limit a little bit. You can see 4 rotary potentiometer. Here you can adjust the alarm limits seperatly.
    The Blue-Wire is the oilpressure incoming signal!
    Philipp

    IMAG0599.jpg!


    IMAG0600.jpg

  8. #8
    Join Date
    Mar 2013
    Location
    Lake Murray, SC
    Posts
    65

    Default

    Thanks fellas this will definitely be helpful. Austin, your dash looks great.

    Does anyone have a good secret to getting behind the dash without removing the windshield or unattaching all of the switches? I cannot pull the entire dash cover off because the switches are still hooked up (the switches on the side panels are my limiting factor being as the wires do not have enough play for me to pull them out more than maybe 6 inches) and It's difficult to access behind the gauges because of the windshield.

  9. #9
    Join Date
    Jun 2010
    Location
    Round Rock, TX
    Posts
    12

    Default

    In my case it was actually quite easy to remove it without involving the windshield. Just unplug a couple of the white connectors that connect the fuse-block to the dash harness as well as the main harness connector (black - mine ran behind the fuse block), one 1/2 turn black plastic screw at the top of the dash pad near the windshield, the two screws at the bottom of the two switch panels and two just above the steering column then remove the dash as a unit, switches and all.


  10. #10
    Join Date
    Mar 2013
    Location
    Lake Murray, SC
    Posts
    65

    Default

    Fantastic. Thank you very much.

Posting Permissions

  • You may not post new threads
  • You may not post replies
  • You may not post attachments
  • You may not edit your posts
  •