Page 1 of 3 123 LastLast
Results 1 to 10 of 22
  1. #1
    Join Date
    Apr 2012
    Posts
    223

    Default Ballast Install - 98 Supra Comp


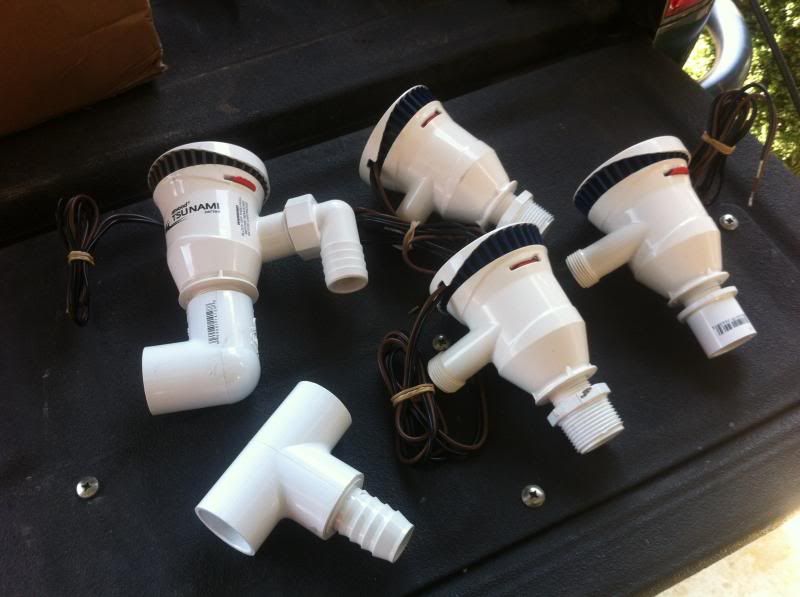
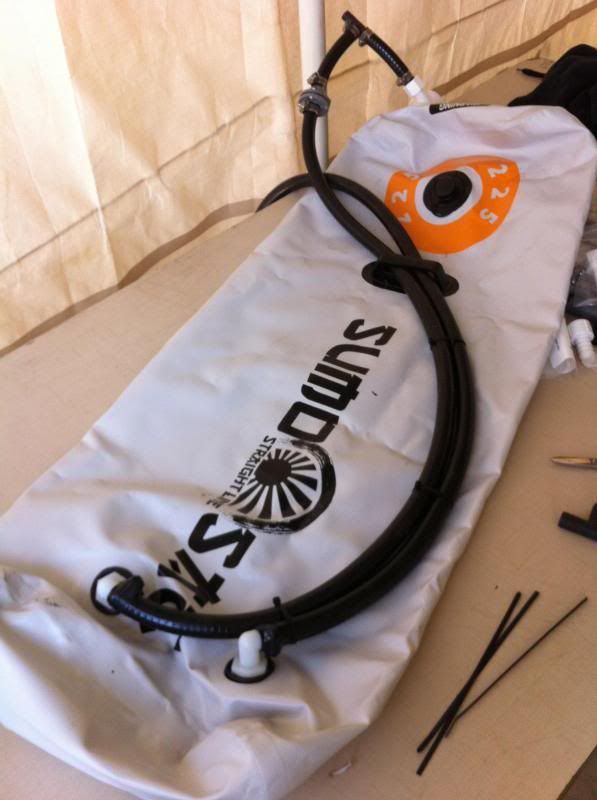
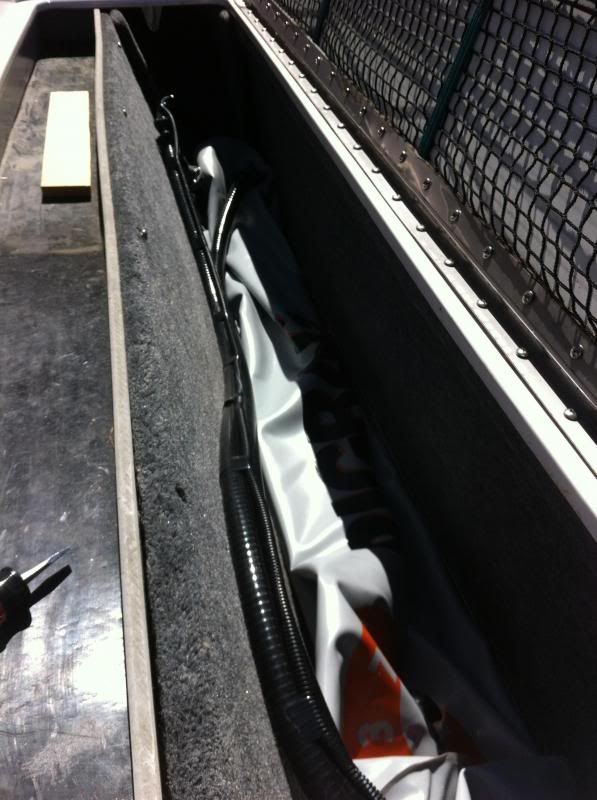
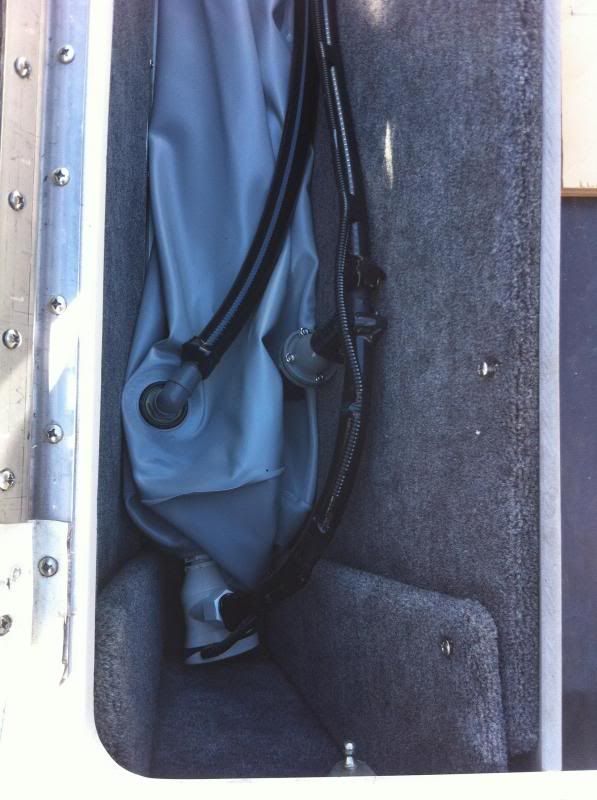
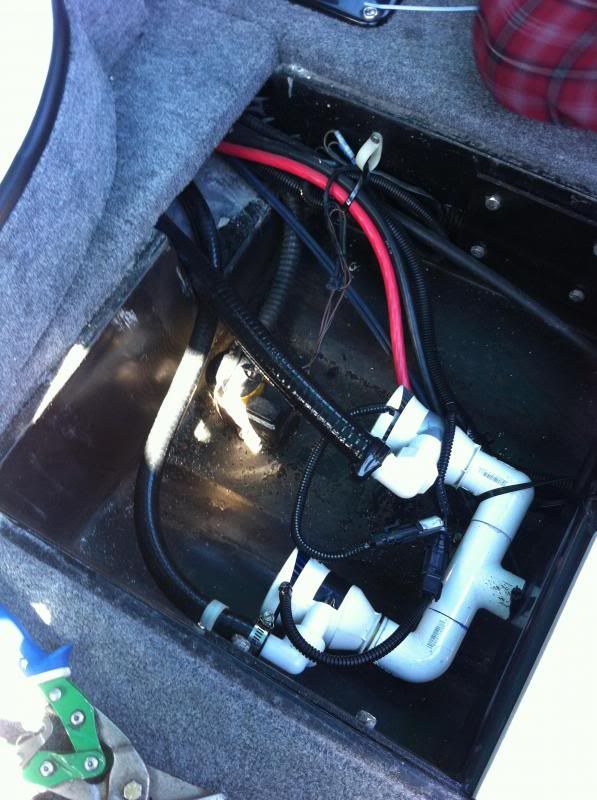
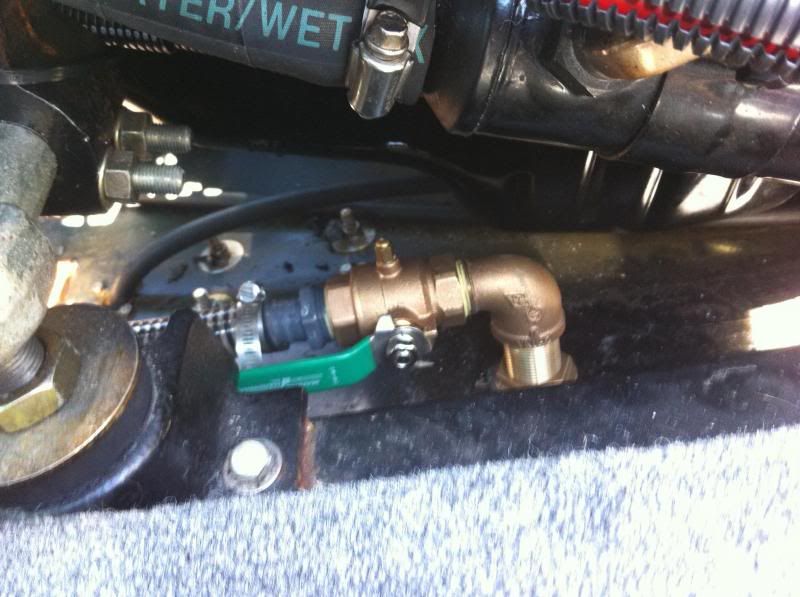
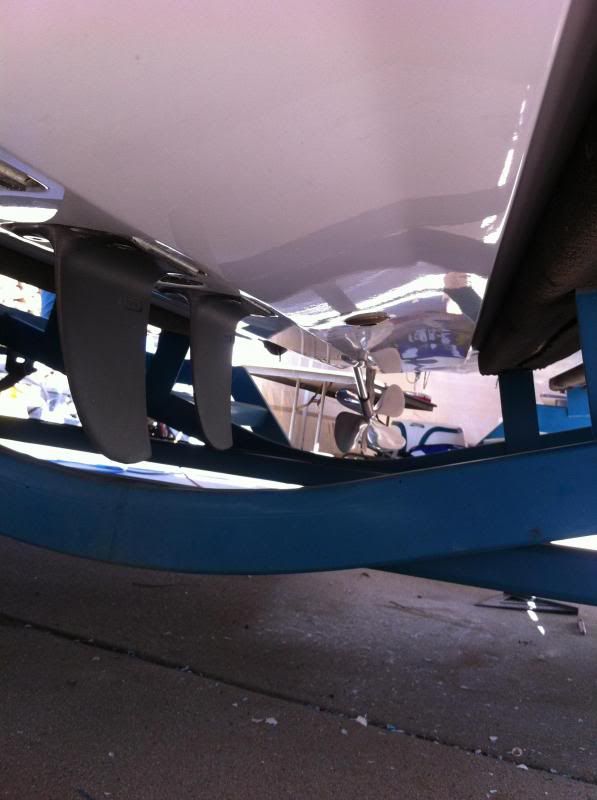
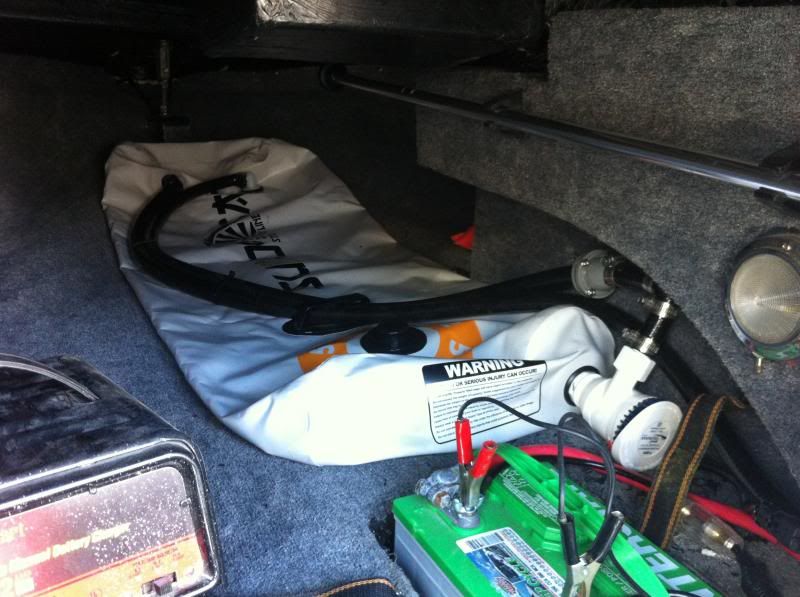
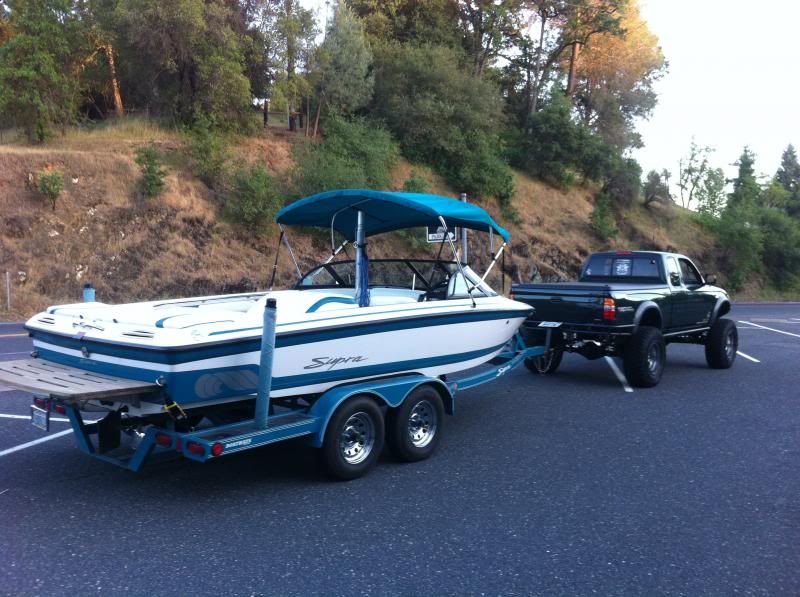
    Finally got tired of messing with hoses and cigarette lighter plugs, and waiting to ride. Spent the money and decided to do a ballast system for my 98 comp. After moving around sacs and rock bags for weight, I decided on a 225 Straightline Rucsac for under the bow, and a 375 Straightline Big Bar for the rear locker.

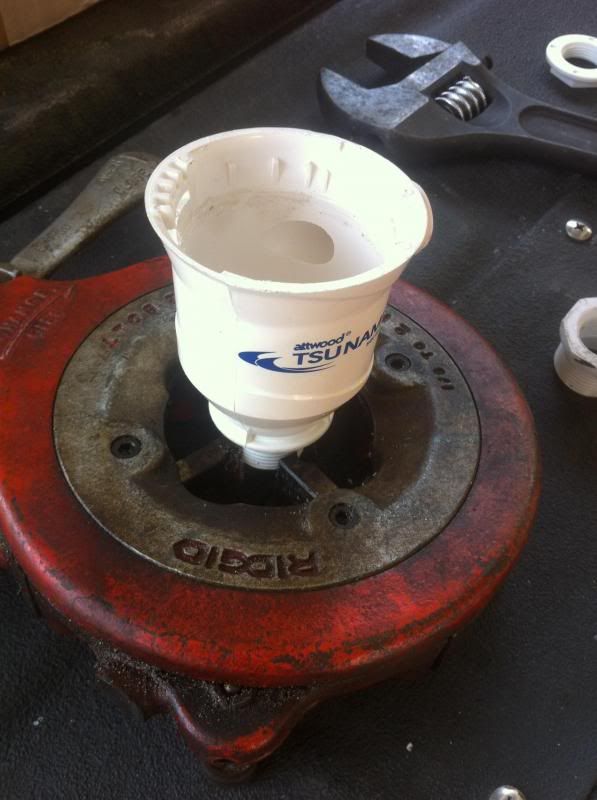
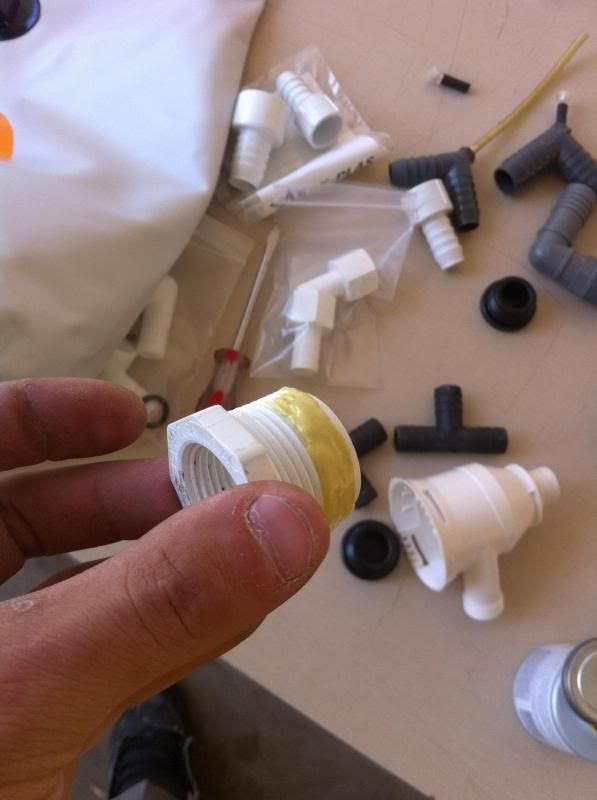
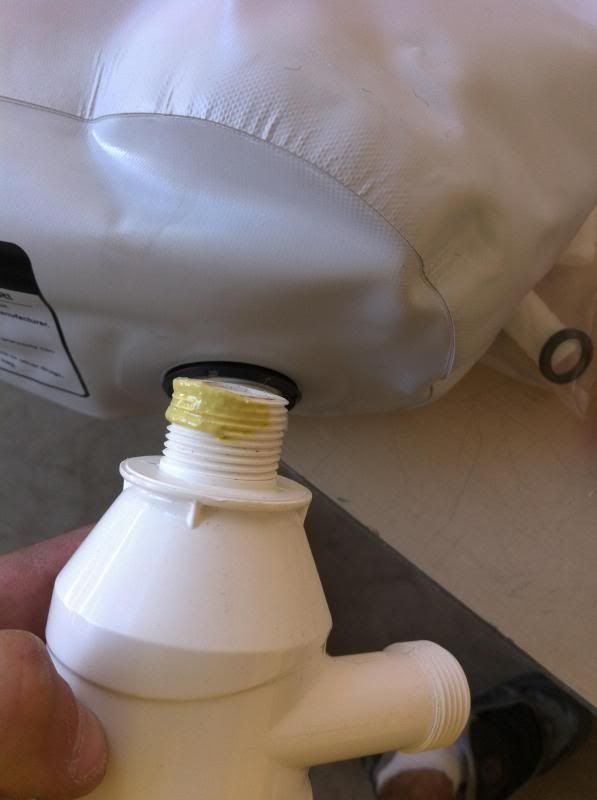
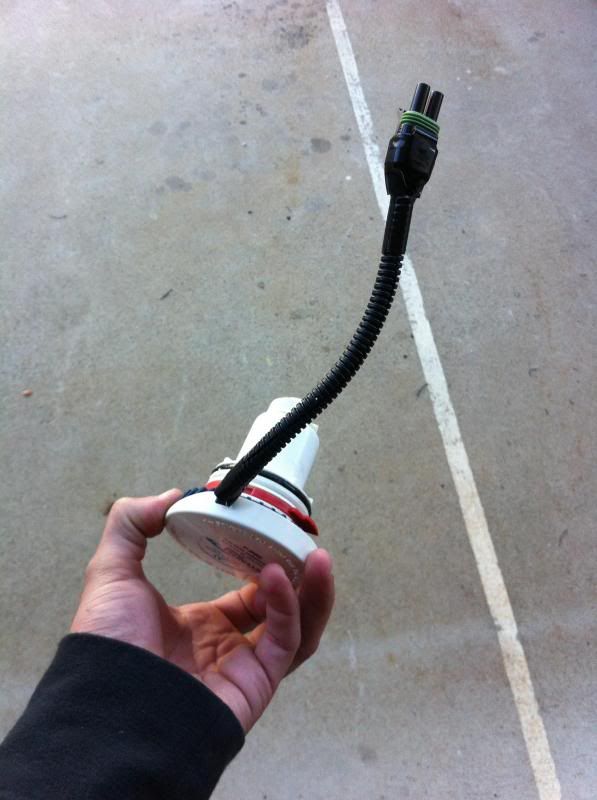
    The Straightline bags use 1" NPT fittings throughout. The 800 GPH tsunami's use 3/4 straight threads. To adapt the 1"NPT to the 3/4, I used a 1"X3/4" PVC threaded bushing. The problem was using a straight thread on a NPT thread would not seal well, as the sealing is only done on the last thread. I threaded the pumps for a NPT thread, as the thread pitch and diameter is identical, one is just tapered and one is not...

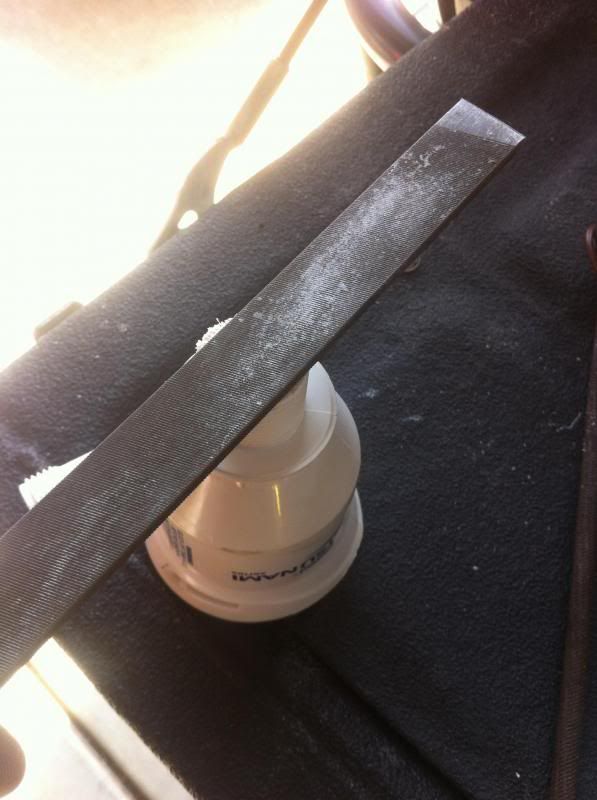
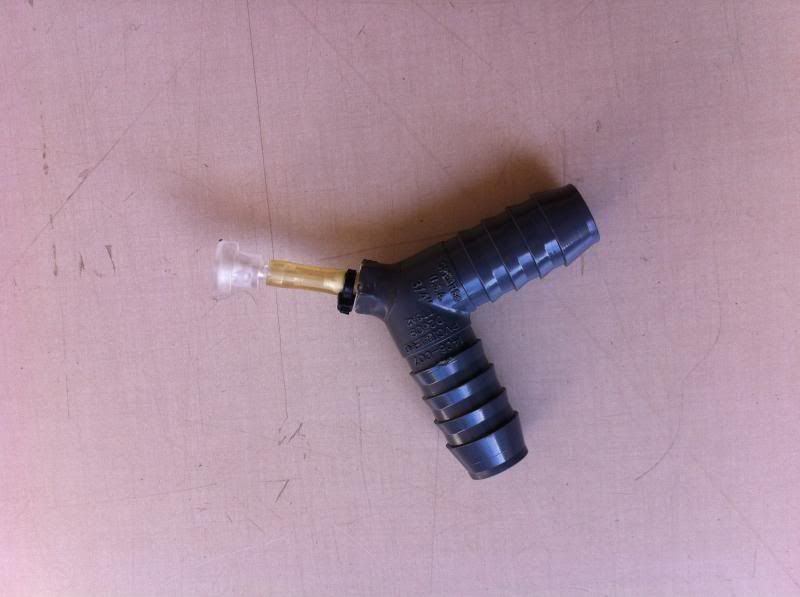
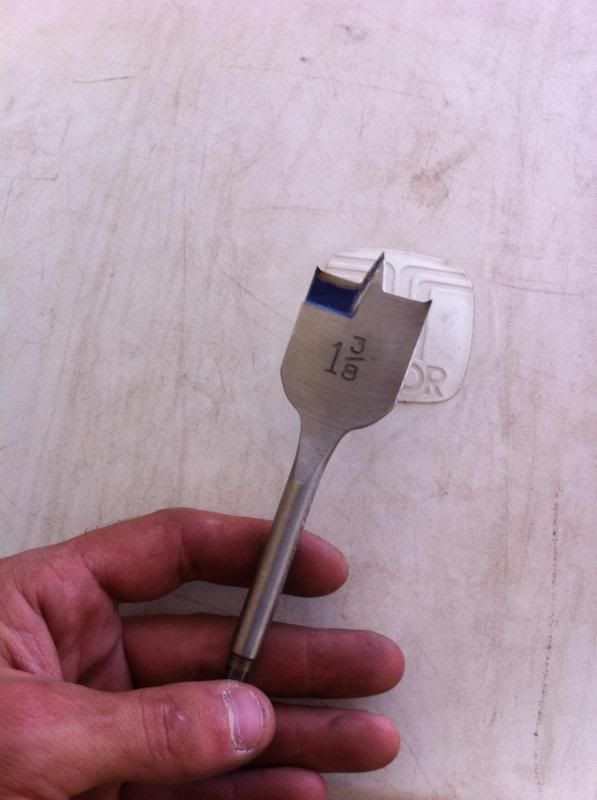
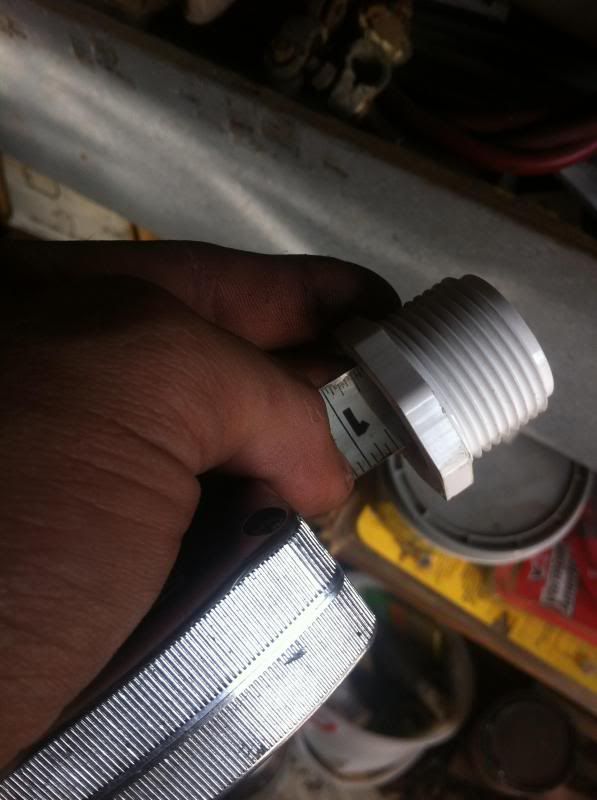
    I first measured the length of the bushing's threads. I wanted the threads on the pump as short as possible, especially on the rear locker pump because I do not have much room to thread the pump on directly.


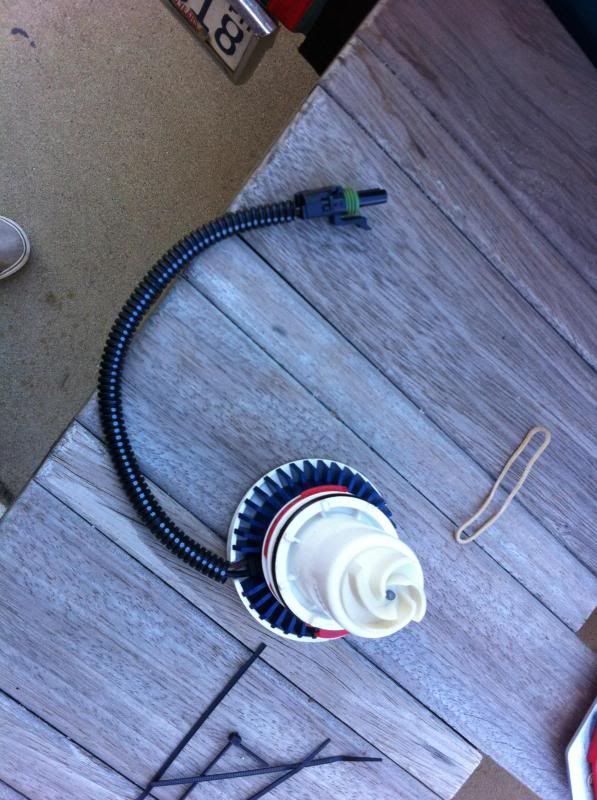
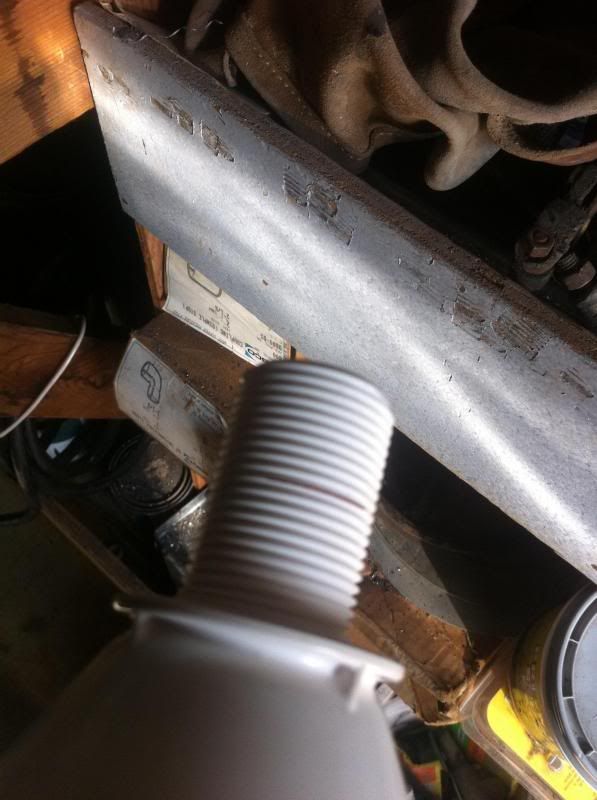
    And then marked the threads on the pumps, at 3/4" long...


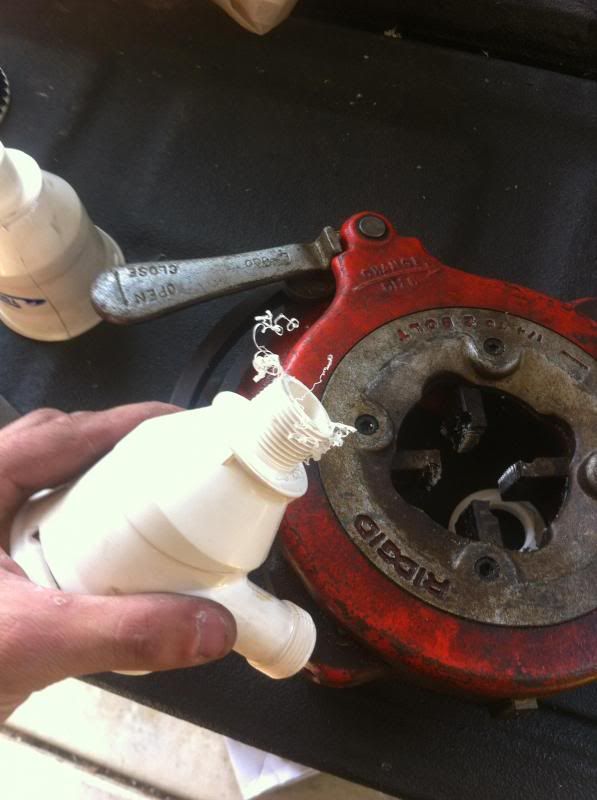
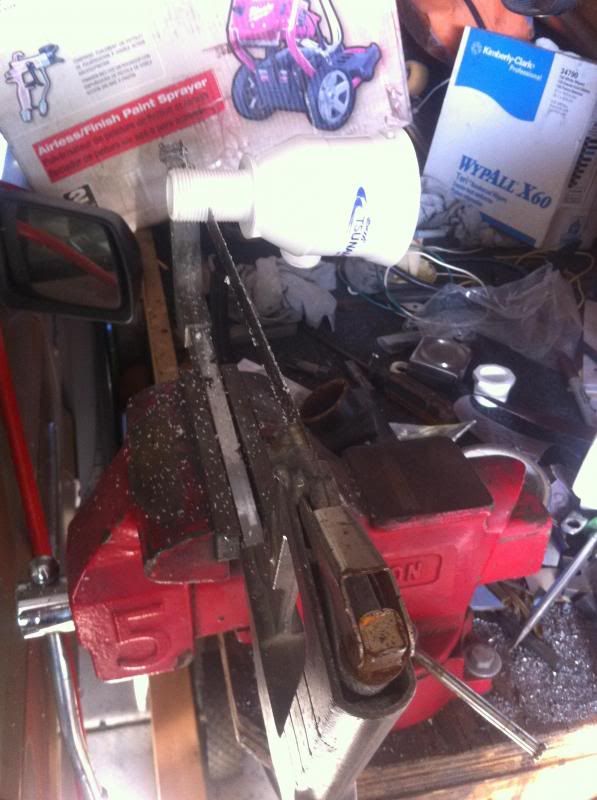
    To cut, I stuck a hacksaw in a vice, and held the pump housing to cut the threads...


  2. #2
    Join Date
    Apr 2012
    Posts
    223

    Default

    Once cut, I filed imperfections out, and make sure the end was flat. I also chamfered the last thread at a 45 degree angle.


    I then used a pipe threading machine die to cut the threads. Using this die allows me to tap the threads all the way to the base of the pump, and adjust till the bushing almost bottoms out on the pump...


    Once done, I removed the pump, and cleaned off the shavings.


    And did the other 2 pumps. Both empty pumps are 800 GPH. The front bag will take a 800GPH pump, and the rear bag will take a 1200 GPH pump. The 1200 GPH pump has the short 1" NPT threads, so no tapping is needed. Also shown is my manifold that I have to make still.


  3. #3
    Join Date
    Apr 2012
    Posts
    223

    Default

    Now, onto the install. I first removed all the panels from the boat, and drilled the thru hulls on the side of the boat. I opted for a 1" spade bit, a holesaw I felt was too coarse for the job and would be more prone to chipping. Marked the holes and added tape to reduce chipping.


    Drilling the hole. Zero chipping from the spade bit.


    I will change out the middle thru hull to match, but here are the 3 thru holes in one spot. The rear one is the rear bag, middle is the bilge, and the front is the front bag.


  4. #4
    Join Date
    Apr 2012
    Posts
    223

    Default

    I then decided to build the assembly for the front bag. Added some sealant to the NPT threads, and threaded the pump on to the empty port on the bag.


    And after adding the fittings, here was what I ended up with.


    Here are my DIY vented loops. On testing day I found that vented loops won't work for my application. (More info at the end of the writeup) FWIW, to make these vented loops, I used a 90 degree PVC barb fitting, a 1/4" NPTX1/8" barb fitting, and a duckbill checkvalve from Ark-Plas. It only cost me about 5 dollars to make this vented loop.


  5. #5
    Join Date
    Apr 2012
    Posts
    223

    Default

    I also ran all the wiring in 1/4" dia wire loom and used 18 gauge wiring. At the ends I used Delphi Weatherpack connectors. These connectors are the same in GM vehicles, they're durable, can hold up to heat, and waterproof. All the pumps run roughly the same length pigtail and connector, so should a pump fail, I can switch pumps around easily on the water, if I ever need to.


    Here's the back bag, with all the hoses plumbed in. Also hard to see is the wire loom taped, which I ran to the front of the boat and tied in at the dash.


    A shot of the back back, port side...


  6. #6
    Join Date
    Apr 2012
    Posts
    223

    Default

    The hose was routed under the deck, in the bilge rear, in front of the motor. With the panel in place, the pumps can be accessed through the deckplate. Left pump goes to the front, right pump goes to the back. The hoses go through the chaseway, and up to the dash, then from there they split.


    I tried to run the thru hull as far back as I could, but still keeping a uphill flow to the pumps. I chose this pot, on the port side of the motor, just in front of the oil filter. Plenty of room to access the ball valve in an emergency situation. From the thru hull to the manifold, I ran 1" clear hose. For drilling, I used a spade bit as well.


    Here's a shot from under the boat.


  7. #7
    Join Date
    Apr 2012
    Posts
    223

    Default

    Here is the front bag, all plumbed in and done with electrical. The hose goes through a hole I drilled in the chaseway, and up to the dash, then to the side thru hull. This prevents any auto draining when underway.


    After the whole install was done, we took the boat out on the water. It was a great day. When dunked in the water, I fired up the pumps and both started filling the bags, with zero priming issues.


    Until I started driving off from the dock. Once I reached about 15mph, I heard the vented loops whining and letting air in the system. The bags were not emptying, but was instead letting the water drain out from the vented loop, and out the thru hull. Even with the pumps off, the whining was present, especially at speed. Once I stopped, the pumps would prime again, and I could fill the bags again.

    I will instead remove the DIY vented loops and install a check valve. I don't have any issues with passive filling, just passive draining. A check valve should solve the problem, and won't make noise.

    As far as the electrical, here are the switches,,,


    The 98 comp came with 2 accessory switches, that were already hardwired in from the factory, and had power. They feed off the breaker panel, but with 10A breakers. I will be changing the breakers to 5A breakers. The switches were only SPST switches (Simple On-Off switches.) I bought two new switch bodies from Skiers Choice, that are On-Off-On switches, just like the nav light switch. No extra holes were drilled for switches and it looks 100% factory. The left switch does the front bag, the right switch does the rear. To the left is empty, to the right is Fill. When set to fill, the switch lights up...

    There's my install. As far as a parts list, here's what I used:

    Wakemakers:
    3 - 3/4 check valves
    1- 1" Check valve
    2 - 3/4" Barbed Tee Ftg
    2 - Attwood 3/4 straight pump fitting
    1 - Attwood 3/4 90 pump fitting
    1 - 1" bronze thru hull
    1 - 1" barb pump 90 degree fitting
    1 - 1" bronze ball valve
    1 - 1" Bronze St Elbow
    2 - 3/4" Thru hull fitting black plastic
    3 - 1" MNPTX3/4" hose barb elbow
    50' 3/4 ballast hose
    25' 1" ballast hose
    1' 1" clear ballast hose
    11' 1" and 3/4" PVC Pipe (Not shown in the pics, but I ran PVC behind the side panel to the back of the boat. No dips/sags, and easier to run. Cheaper too)
    1 - Attwood 1" NPT 1200 GPH pump
    3 - Attwood 3/4" 800GPH pumps
    1 - Straightline 375 Big Bag
    1 - StraightLine Rucsac 225

    DelCity:
    50' Black and Brown 18ga Primary Wire
    8 - Female Weatherpack Terminal Female
    8 - Male Weatherpack Terminal Male
    16 - Weatherpack plugs
    4 - Male Weatherpack housing
    4 - Female Weatherpack housing
    4' - Black dual wall heat shrink tubing

    FlexPVC.com:
    2 - 1" BarbedX1" slip PVC fitting
    2 - 3/4" barbedX3/4" Slip PVC fitting
    1 - 1" BarbX1" Spigot PVC fitting
    1 - 1" Barb X 1" MNPT fitting

    Home Depot:
    1- 1" PVC 90
    1 - 1" PVC 90, 1" SlipX1"FNPT
    2 - 1"x3/4" PVC NPT threaded bushing
    1 - 1" spigotX3/4" FNPT bushing
    1 - 1" PVC Tee

  8. #8
    Join Date
    Aug 2009
    Location
    NW Houston
    Posts
    1,330

    Default

    Super clean install. Thanks for the write-up. Hope you get the draining issue resolved.
    _______________89 Saltare Resto Project___________
    _________Then________________________Now_____

  9. #9
    Join Date
    Jul 2011
    Posts
    499

    Default

    get a shot of the wake with it weighted if you can.

  10. #10
    Join Date
    Feb 2009
    Location
    Edmond, OK
    Posts
    2,508

    Default

    Looks like a good set up...nice job!

Posting Permissions

  • You may not post new threads
  • You may not post replies
  • You may not post attachments
  • You may not edit your posts
  •