

Just finished my swim platform rubrail install on my '08. The '08's came with a grab handle which I removed and sold and ordered the rubrail they are using on the 2010 models now. I have included some pictures of the finished project. Total cost was about $130 which included the stainless bolts/washers/locking nuts/plastic caps I had to order.
I have included a step by step on how I did it.
1. First remove the old grab handle
2. Your rub rail will come with stainless sheetmetal screws, stainless strip and rubber under piece. You will install the rubber piece first with the stainless screws. You need to mark dead center on the swim platform and rubber piece. Once you have it marked on both line up the piece of rubber, make sure and install in so the rubber lip is tucked up tightly against the bottom of the swim platform.
3. Pre-drill the holes before screwing in the stainless screws or you will crack the platform. You will need to space the screws out to be offset from the bolts from the stainless strip. Take a look at the picture and see how between each bolt there is a black mark (auto touch up paint) where the stainless screw was installed. The screws are from the rubber under piece and the bolts are from the stainless rub rail. Make sure and install the screws in the center of the rub rail so the stainless piece will cover them up.
4. After you have the rubber piece full installed and wrapped on the platform you are ready to install the stainless rub rail which lines up nicely on the piece of rubber. Your piece should be cut to length, I started in the middle and worked my way in each direction. Make sure you are dead center you dont come up over/short when it reaches the end.
5. I am not a big fan of stainless screws into fiberglass so I went to Ace hardware and bought some stainless 1 1/4" bolts/washers/locking nuts to replace the screws. Take down a sample screw to match up the length and size needed. I only used this on the stainless piece, the screws were fine for the rubber under piece. This is not a must, but it is so much better and will never come loose on you. It adds about $20-25 in install cost, but I think it is well worth it.
6. Again, pre-drill the holes and install the bolts/nuts/washers. I worked from center outward. You will need to put a little pressure on the corners to bend the stainless strip but its not too difficult.
7. After this is complete install your end caps, I had to go with 1 1/2" long bolts for these, the 1 1/4" were a little to short.
8. Next I cut off all the sheetmetal screw threads and grinded them down with a dremel tool. Try and cut them as close to the platform as possible, it will reduce the amount of grinding. A good pair of tin snips will take them right off. I found it easier to cut them off, grinding them was a little difficult and I hit the rubber rail on the underside a couple times. Thankfully its only noticeable if you are under the swim platform... doh! Make sure and do this so nobody cuts themself when grabbing onto the platform.
9. Once they are grinded down I used automotive paint and touched up the areas where it was grinded.
10. I also purchased plastic bolt caps to put onto the remaining threads sticking out on the bolts (red caps). Again to prevent anyone from getting scraped. People tend to want to grab the underside of the lip on the platform to pull them closer before they get up on the platform. Even though the bolts were not to sharp I would recommend also doing the caps for added protection.
Thats it, you are done. This should take about 1-2 hours, with going down to the hardware store to pick up your bolts and nuts.
Any questions feel free to send me a PM or message. I really think this looks fantastic when done, it really finishes off the swim platform and also adds a little protection from boards hitting it. I ordered all my parts from Viper Customs (865-388-4096) , ask for Jim Jackson he will take care of you.
Travis.....

 Reply With Quote
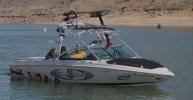

")
