More pics of the progress thus far.
Gotta love the Canadian winters, where all of you are chipping out wet foam and water, I'm doing so with ice and frozen foam.
Enjoy!

 Senior Member
More pics of the progress thus far.
Gotta love the Canadian winters, where all of you are chipping out wet foam and water, I'm doing so with ice and frozen foam.
Enjoy!
Senior Member
Hey, at least you have a place you can pull it into to work on it...I have to stare at it on the driveway and wait for spring.
I'm in Ajax, cottage is just north of Apsley.
Senior Member
So, after a few weeks hiatus , finally got back to work this weekend.
Outside stringers are out, new ones cut and shaped and ready to be glassed in.
Looking to have them glassed in, and inside stringers cut and hopefully in by the end of the coming weekend as well. Feeling pretty confident about how fast we can get them out and back in based on some things we learned with the outside ones.
Man were they rotten, basically fell apart as soon as I cut away the fiberglass.
I was a little bit itchy from the sanding and cutting on Sunday night, will be more diligent about my attire this week.
Bottom line, fastest method is, go at them with the sawsall, clean up bigger edges with a cutting wheel, and then take em flush with a die grinder.
Ice just came off the lake by my house within the last 2 days, so it looks like its going to be a race to the finish at this point
Here's a few pic's:
Senior Member
Glad you're making progress. The inner stringers might take a little longer due to the engine bump out, but they're not that bad. Man, I don't miss the fiberglass grinding itchies.
I'm a warm water wimp - if the ice just melted, I sure wouldn't be in a rush to get in. Good luck with continued progress.
_______________89 Saltare Resto Project___________
_________Then________________________Now_____
Senior Member
Looks like some good progress is being made. Like sybr, I don't miss the itching. He's right that the mains will take a little longer. Not only will you have some extra time in building out the engine bump, but shaping the stringers and glassing them is a bit more work.
Senior Member
Also, something to think about. Much of the reason these boats had rot had to do with wood having the ability to be exposed. You might consider completely glassing the main stringer prior to building the engine bump. This allows the stringer itself to be protected and isolated if the other pieces started having any issues instead of their rot being like a cancer that starts to impact the main stringers.
Senior Member
Thanks for the encouragement guys!
Okie - I like that idea of isolating the inner stringer, anything I can do to "1-up" the construction that was done at the factory is ok in my books.
Picked up 10gal of poly resin, cab-o-sil, milled fibers, and some mixing cups, yesterday so its looks like were going for bust this weekend!
Should have more pics after the weekend.
A few question for you guys:
Filleting - I am going to router the top edge of the stringer to ease the laying of the glass over the top, is it suggested to do the same on the bottom to allow more of the resin/cab-sil "putty" to make contact with both the stringer and the hull? Or do I just keel the 90 degree angle and fill in accordingly?
CPES - I was originally planning on coating my stringers with the as a preventative measure from future rot, although was advised otherwise by the rep @ Canada Composites. He mentioned that It would "dilute" the adhesion quality of my fiberglass to the wood. Any thought on this?
Inner Stringers - I was wondering about the "engine bump". It appears currently on mine, that aside from the actual inner most stringer (adjacent to the bilge area, and the outer most support, the is actually a "void" or airspace underneath where the motor mounts were placed. Is this normal? or an oversight from the factory?? I know SYBRMIKE had mentioned some airspace under his stringers. Is this what you were talking about mike? My plan is to bed in the adjacent "engine bump" pieces of wood the same way I do the other stringers. With the resin/cabosil bedding material, up against the hull. Surely this is more structurally sound than that of the previous way. Any thoughts on this??
Lastly, anyone who is in Canada, and moreso the Toronto area who are considering this job, contact the guys @ Canada Composites, extremely knowledgeable, friendly and reasonably priced fibreglass products and accessories.
Stay tuned, more updates and pics to come. . .
Senior Member
Good luck this weekend!
Filleting - good call rounding over the tops of the stringers. No need to round the bottom edges. Just make sure to lay down a thick enough bead of filler that the stringers don't directly contact the hull. I beveled the bottom edge to more closely follow the contours of the hull, but just rounded the corners slightly with a sander to take the edge off.
CPES - questionable since you're using poly resin. Epoxy will bond to poly, but not too good the other way around. I used poly resin & so did not use CPES on the stringers for this reason - just liberally coated the wood with resin prior to laying cloth. I like CPES & am using it on seat bases and anything else not coated in poly.
Engine bump - I thought I recognized that familiar hollow space under your mounts in previous pics. Yes, that's exactly what I was describing on mine. By all means, go back solid under your mounts - added meat for engine mount bolts, added surface area for adhesion in critical area, added mass for vibration dampening, etc.
_______________89 Saltare Resto Project___________
_________Then________________________Now_____
Senior Member
Thanks for the thoughts info Mike. Much apreciated!
Just picked up my 2x10x20 pieces of Douglas fir for the inner stringers and awaiting arrival of my marine plywood.
Should be a fun and productive weekend!
Senior Member
sybr got you covered on the answers and he's right on the money. If you were using epoxy resin, CPES is the way to go.
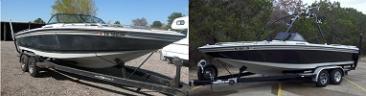
I'd recommend the following on the engine bump, after installing and glassing the main stringer. Do a build up of two 2x4's and then one piece of plywood for the platform the engine mounts will set on. Then wrap it in the plywood that takes it up to the deck height as the final pieces. I used thickened epoxy and clamps and did each piece one at a time. I made sure there was a gap between the board and the floor that I filled with the thickened epoxy as well. Once they were all "glued" in, I glassed over them. I think I did an extra layer of thickness on the surfaces the engine mounts were bolted to, if I remember correctly.
I've attached a pretty good picture for a visual. On the left you see the stacked wood all "glued" in place. On the right, you see the same thing, but already glassed.
Another point about putting things in. The entire build of the stringers, support ribs, and deck have absolutely no fasteners on my rebuild. I did that in an attempt to minimize areas for water penetration to occur, especially from one piece to the other at joints, etc.
Last edited by Okie Boarder; 04-15-2011 at 05:25 PM.
 Posting Permissions

 Reply With Quote