Page 1 of 15 12311 ... LastLast
Results 1 to 10 of 146
  1. #1
    Join Date
    Mar 2011
    Location
    Charlotte, NC
    Posts
    316

    Default Summer ended shortly for me :( Resto begins.

    Hey guys,
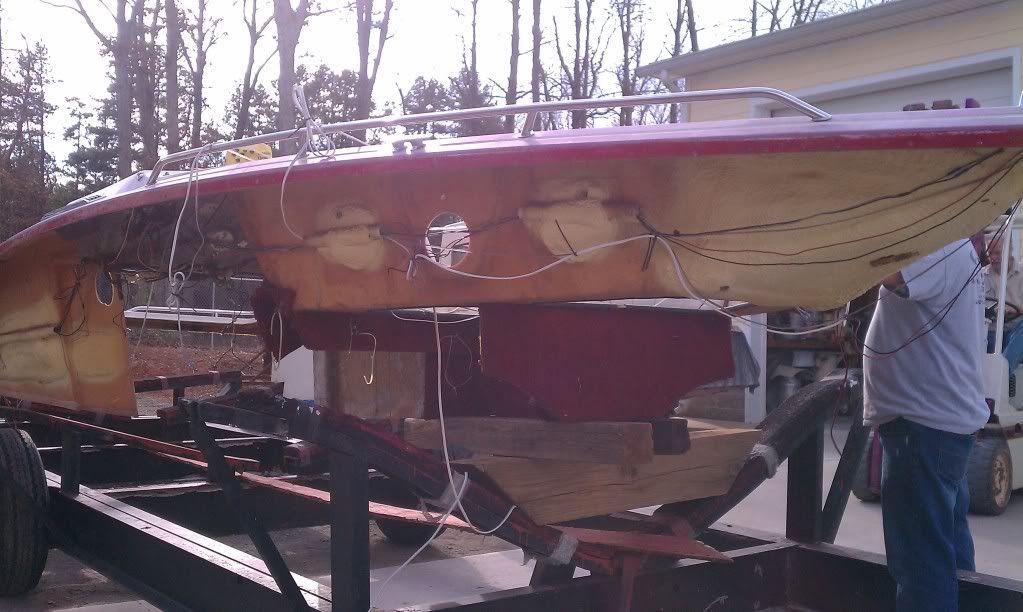
    So I went to get my boat from where I store it and found that I forgot to take the plug out of the boat. It has been storming really bad since I was last out, so needless to say....The boat was full of water (6 inches above the floor line). I guess this is the Boat Gods way of telling me its time to get started on the resto of my beautiful 87 Supra Saltare.

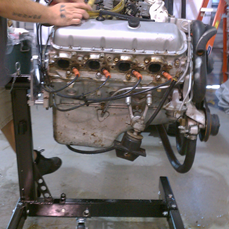
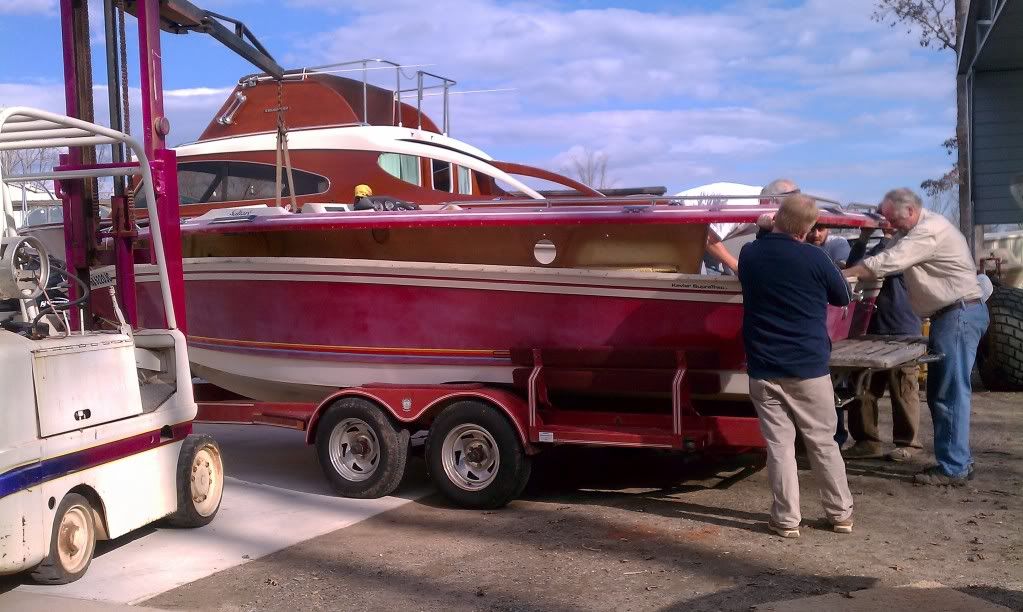
    I've got a guy who said he will do the stringer/floor replacement for me, but I have to pull the motor and top cap off myself. No big deal since the price is right! I think I have a good idea of the things I have to disconnect to pull the motor out of the boat. However, I was wondering if any of you guys could give me some pointers on how to get the top cap off. Like what are the things I need to locate and disconnect. I have a guy who will bring his forklift over to my place to remove everything all at once. So I have got to have everything disconnected and ready to be pulled before I call him.

    Thanks in advance.

  2. #2
    Join Date
    May 2006
    Location
    Nashville
    Posts
    2,127

    Default

    Oh man, that's tough. Take some before pics, and keep us up to date. I know the guys who have already done this will chime in when you need them to.

    Good luck man.

  3. #3
    Join Date
    Apr 2009
    Posts
    109

    Default

    It is actually very easy take your time and brake it down in simple steps and you will get it
    To remove the top cap
    1. Remove the interior seats dog house ect. You can leave the cup holders in but you have to remove the panel that holds the shift and throttle cable
    2. Disconnect the main harness between the engine and dash board
    3. Disconnect the battery cables
    4. Disconnect the bilge hose I cut mines because I planed on replacing it
    5. If there are any more wires other than the main harness coming down of the dash mark them and cut them
    6. Remove the gas tank
    7. Remove the rub rail and drill out all of the rivets
    8. Lift the top cap off. I would suggest using some kind of spreader bar I would think 12ft beam would work. I did not use the spreader bar when I did mines and it was a bit sketchy. Have tools on hand when you are lifting it off just in case you missed wires or hoses so you can disconnect or cut them.

    9. I did not take my engine out but I would think your pretty much ready to pull it out once the cap is off.

    Take lots of pics before especially close ups. Things come up projects get off track and a few months after your trying to put stuff together its helpful to refresh your memory of how it all goes back together.

  4. #4
    Join Date
    Apr 2009
    Posts
    109

    Default

    Also I found this to be very helpful on my last project and it saved me a bunch of time to. Go to the store and get a box of zip lock bags and a few sharpies. When you remove screws bolts ect put them in marked bags. Even if you dont plan or reusing some of the rusted bolts save them in marked bags. When your trying to put stuff back together it is helpful to see what was there so you know what to replace it with.

  5. #5
    Join Date
    Mar 2011
    Location
    Charlotte, NC
    Posts
    316

    Default

    Hey everyone,
    I know it has been awhile since I gave an update on my Resto project so here is a small update.

    The boat has been out of the water since July and since then I have removed the motor and all the interior to begin the stringers and floor. The motor is completely taken apart and on the motor stand.


    I have been hard at work making all the accessories look good and new again and am finally done with that.


    The motor will actually be taken to the local machince shop to have the heads ported and polished and a valve job done as well as honing the cylinder walls, new rings and bearing throughout. The motor had 1300 hours so I figured it was due for a refresh.
    Last edited by wspeedin; 01-09-2012 at 12:33 PM.

  6. #6
    Join Date
    Mar 2011
    Location
    Charlotte, NC
    Posts
    316

    Default

    I plan on having a local guy redo the stringers and floor but to make it a little cheaper Im bringing him just a hull. So this weekend I had some buddies help me seperate the hull from the top cap. Surprisingly, it was simple! I got in the boat and after a couple hours unscrewing the rubrail and removing the screws from inside and disconnecting everything else we hooked it up to get removed.

    We used a piece of 6x8 lumber to span between the two cubby holes in the walkway as the lifting point and voila! It was off!!
    Being suspended in the air, I just drove the boat out from underneath and then backed a trailer into where the boat was. We just set the top cap onto this trailer and supported the sides so it didnt have any flex. You know, jsut in case I want to trailer it somewhere, lol.


    So then I just took the hull over to the guys shop and he said he will be done in about 4 weeks. Lets cross our fingers and hope so, cus soon it will be riding season.!!!!

  7. #7
    Join Date
    Feb 2009
    Location
    Edmond, OK
    Posts
    2,508

    Default

    Looks like you are off to a good start!

  8. #8
    Join Date
    Sep 2010
    Location
    Collegedale, TN
    Posts
    1,905

    Default

    Looking great. Keep us updated with your progress.

    1986 Saltare
    Restoration link: http://supraboats.com/bbs/showthread.php?t=7839

  9. #9
    Join Date
    Sep 2004
    Location
    Hudson, WI
    Posts
    2,651

    Default

    The forklift has to make this about 2 billion times easier. Good work!!
    Former owner of a 1987 Supra Saltare. Current owner of a Malibu 23LSV.

  10. #10
    Join Date
    Mar 2011
    Location
    Charlotte, NC
    Posts
    316

    Default

    So this weekend I decided to try and do some engraving on some pieces.
    The storage doors above the cooler are made of acrylic and are tinted. I plan on putting red lights inside the storage areas and i thought that it would be cool if something made it a little more cool.
    So, I cut a new piece of acrylic and started some engraving. This picture is just a test to see how it would look.

    hope yall like

Posting Permissions

  • You may not post new threads
  • You may not post replies
  • You may not post attachments
  • You may not edit your posts
  •