Page 4 of 33 FirstFirst ... 2345614 ... LastLast
Results 31 to 40 of 330
  1. #31
    Join Date
    Aug 2009
    Location
    NW Houston
    Posts
    1,330

    Default

    Well, I finally made the time to get started on the project (waiting for some free time to show up wasn't working out - faimily, work, etc.). Definitely gonna hafta just schedule dedicated boat time on a regular weekly basis...

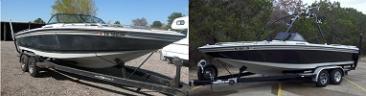
    Cleaned out the garage & made room. She just barely fit under the 7' door beam, but can walk around inside without bumping my head on the rafters now that she's inside (helps that I'm only 5'6"). Pulled the rear seats, ski locker & hatch, side panels, observer's seat, & moved the gas tank so I could take a look underneath. My rear layout looks very much like Okie's Sunsport ('89 too I believe) - mufflers, blowers, etc. Unfortunately, the substructure looks like Okie's as well - rotten. The bulheads between the inner and outer stringer where the exhaust passes thru are mush and the foam forward of them is wet. So much for the tight engine & tranny bolts being a good omen... I know it might be possible to patch her up good enough to last a few seasons since the driveline is solid, but since I was gonna do the floor and interior anyway - might as well plan on doing the whole thing right. Really didn't want to do a full top cap removal stringer job, but oh well... Fortunately, I got her cheap enough that I think it'll be worth it.

    I'll know more once I pull the rest of the interior & can get the floor(s) up. I know it won't be ideal working conditions, but I took some measurements & looks like if I take the windshield off - I can lift the top cap from the rafters and suspend it directly overhead with just enough room to pull the trailer/hull out from underneath. Problem is, the only place in the garage I can lift the cap is the only space available to work on the hull on the trailer. I'm considering pulling the trailer/hull out from under the suspended cap. Then lowering the cap onto some type of wheeled dolly arrangement. Relocate the cap to a different area in the garage & then move the trailer/hull back into original positoin. For those of you that have removed the top cap - do you think a removed cap can be dollied around. I can't quite tell from the posted pictures if there are any good places on the bottom edges to set it down on?

    Oh yeah, good news - ordered a closeout blem 2009 Coex for the kids' Christmas & received a new 2010 instead. Bad news - now the pressure's on to get this thing lake ready for spring.

    Thanks again in advance for all your experienced advice.
    _______________89 Saltare Resto Project___________
    _________Then________________________Now_____

  2. #32
    Join Date
    Feb 2009
    Location
    Edmond, OK
    Posts
    2,508

    Default

    Sorry to hear about the rot, but it isn't surprising. Time to get to work and make some progress. Spring is coming quick!

    Be careful lifting the top cap with your rafters...it is pretty heavy. You might consider strengthening them some. If they're open, maybe lay a 4x4 across several rafters and lift with that.

    There are spots under the gunwales that are pretty solid that you could build a cart to hold at those points. You'll be able to see it once you get the top cap up. You might try lifting the top cap enough to get a good view under there, then build your "cart".

  3. #33
    Join Date
    Apr 2002
    Location
    Austin
    Posts
    2,164

    Default

    sucks to hear but at least you'll have a like new boat when you're done.

    i'd be surprised if you have enough room in the garage to lift the topcap off. the inner walls of the interior are attached to the top so it needs to clear the hull by 3' or so. if you could lower the hull onto a low-rider dolly you might get away with it. would be alot easier to climb in and out of the boat too. that gets old pretty quick. but that's alot easier said than done.

    okie's right about the weight. i'd guess it's somewhere in the 500 lb range.

    if there's room in the garage to lift the topcap, can you lift it on one side and then move the boat to the other side to work on the hull?

  4. #34
    Join Date
    Aug 2009
    Location
    NW Houston
    Posts
    1,330

    Default

    Thanks Okie. Kinda bummed, but down deep I knew it was coming - just was in denial.

    Yes the rafters are open & planned on spanning on top with a 4x4 to spread the load and lift from there. Having the entire interior & dash out and the windshield off should help lighten the load. I'm gonna leave the rails in place to help add support to the cap while it's loose. Are four lifting points (2 @ each side front and rear) adequate or do I need to add 2 more in the middle?
    _______________89 Saltare Resto Project___________
    _________Then________________________Now_____

  5. #35
    Join Date
    Aug 2009
    Location
    NW Houston
    Posts
    1,330

    Default

    Salty,

    Yeah, I know it's gonna suck, but I just love the looks of the old Supra's - especially the Saltare. I'm fairly competent at fiberglassing, woodwork, & mechanical so confident I can get her back in shape structurally. Just hope a new interior, gelcoat rehab, & accessories (tower, stereo, etc.) will clean her up real nice.

    I've measured pretty good & looks like there is indeed room to pull out from underneath the suspended cap with the windshield off (want to re-powder coat the frame and tint the glass anyway) with a few inches to spare. Really don't want that thing hanging over my head (literally).

    Unfortunately, due to the width of the trailer with welded on guide bars, column location, door size & layout, etc. - I've only got one bay where the boat/trailer will fit. I can make room in an adjacent bay to store the cap only, but I can't lift in that area and the trailer won't fit so it's either leave it hanging overhead (in my way while working on the hull) or move it once it's off.
    _______________89 Saltare Resto Project___________
    _________Then________________________Now_____

  6. #36
    Join Date
    Apr 2002
    Location
    Austin
    Posts
    2,164

    Default

    sounds like you've got it well thought out, this will be fun to watch...

    i'd go with 6 lifting points although the 2 in the rear keeps things balanced more than lifted. the rear section might weigh 20lbs. i say 6 because i'd put 2 about where the front speaker holes are and 2 more just to the rear of the windshield...where the gunnels flatten out. the rear 2 will keep the stern from sagging. the playpen area is very heavy too.

  7. #37
    Join Date
    Feb 2009
    Location
    Edmond, OK
    Posts
    2,508

    Default

    Quote Originally Posted by Salty87 View Post
    would be alot easier to climb in and out of the boat too. that gets old pretty quick.
    You can say that again. I was thinking about this last night. I have a 4' step ladder sitting next to the boat to get in and out. I've probably used that thing well over 100 times by now.


    Quote Originally Posted by Salty87 View Post
    okie's right about the weight. i'd guess it's somewhere in the 500 lb range.
    I was thinking even more than that, but I bet that's really close.

    I only lifted mine in 4 places, but yours is a few feet longer and probably a little heavier. I'd say 6 is better, like Salty said.

  8. #38
    Join Date
    Aug 2009
    Location
    NW Houston
    Posts
    1,330

    Default

    Thanks guys - six lifting point it is then.

    This weekend I hope to get the rest of the interior out, windshield off, and start pulling the floor to see just how bad it is down there.

    Looking down the road a bit & getting ahead of myself I know, but a few questions:
    1. Obviously, I'll be pulling the engine & trans. It was running fine but planning on rebuilding the carb (it looks nasty), upgrade to electronic distributor, new impeller, belts & hoses, riser gaskets (rust indicating leaks), & general detail & paint. Should I also remove the rudder & drive shaft & plan on new packing while I'm at it (there didn't appear to be any leaks)?
    2. If the drive shaft goes, is it out the top or bottom (remove prop or coupling)
    3. I have the same rudder and tiller arm as Okie. I know it was a PITA to get out, but never saw the details of how it finally came out. Any words of wisdom in hindsight, Okie? How is it sealed? Packing? - I don't see a zerk.
    4. Besides measure, measure, measure - any hints on building the motor mounts back in the right location/dimensions? I was thinking of making cross section templates that span the keel where the mounts are.
    5. Will I need to fill/seal the old rubrail rivit & screw holes before rejoining the halves? Run a layer of glass tape on the edges?

    Thanks again.
    _______________89 Saltare Resto Project___________
    _________Then________________________Now_____

  9. #39
    Join Date
    Apr 2002
    Location
    Austin
    Posts
    2,164

    Default

    1. it's alot easier to mess with that stuff when the floor is off. put the shaft somewhere safe, cover the threads on your water intake so you don't drip resin on them (what a pain in the butt), check the mounting plates for the strut, skegs, and rudder. some people replace these, mine were ok...or so i thought...more on that in #3...
    2. depends on whether the coupler wants to come off easily, you can go either way with it when the engine is out. i had to take my shaft and coupler to the prop shop to get them separated.
    3. my rudder has a zerk but i've been having problems with water coming in. i wish i had dealt with it when the floor and gas tank weren't in the way.
    4. get crafty with reference points. once everything is taken out, it's easy to forget exactly where you are and where things went. don't grind everything completely away until you're ready....the lip of old floor around the hull keeps a reference for floor height, you can mark the hull with spray paint or whatever and grind it away later, cut sections of stringer or engine supports out in large sections so you can use them later for reference...whatever you have to do. templates are good as long as you know exactly where they go.
    5. the old rivet holes will get used again. i wouldn't do anything with them unless they're messed up and you can't re-use them. i just drilled new holes for the rub rail. you'll be using sealant for that step so you shouldn't have to bother with sealing the old holes.

    read up...rickr also has some great photos and descriptions of his comp rebuild. there are more around here...

  10. #40
    Join Date
    Aug 2009
    Location
    NW Houston
    Posts
    1,330

    Default

    Thanks for the hints - good stuff.

    Question on #2 - if you already had the shaft/coupling out, why did you have to take it to be separated?

    Yeah, over the last month I've just about memorized yours, Jason's, Rickr's, and a few other rebuild posts and keep tabs on Okie's progress. I'm sure all the past experience posted here and elsewhere will prove invaluable (to me and others) - so nice to be able to learn from those that have been there before... Just like the resin coated threads - first hand knowledge (?) conveyed to the masses.
    _______________89 Saltare Resto Project___________
    _________Then________________________Now_____

Posting Permissions

  • You may not post new threads
  • You may not post replies
  • You may not post attachments
  • You may not edit your posts
  •